In this article, we will see the steps involved in building a chat application and an answering bot in Python using the ChatGPT API and gradio.
Developing a chat application in Python provides more control and flexibility over the ChatGPT website. You can customize and extend the chat application as per your needs. It also help you to integrate with your existing systems and other APIs.
Gradio is a Python library that makes it easy to create customizable user interfaces for predictive and generative models. It allows you to quickly build interactive applications without needing extensive front-end development experience.
No Front-End Development Skills Required: You don't need to be an expert in front-end development to create interactive applications with Gradio.
To get started, the first and most important step is to sign up using this link: platform.openai.com. You can easily sign up by using your existing Google or Microsoft account. Once you're signed up, you will need to get a secret API key to use the API. It will look something like below. Make sure to copy your API key and keep it for future reference.
sk-xxxxxxxxxxxxxxxxxxxxxxxxxxxxxxx
After completing the sign-up process, you may receive a free credits to test the ChatGPT API if your phone number has not been associated with any other OpenAI account previously. Otherwise, you will have to add atleast 5 dollars into your account. Charges will be based on usage and the type of model you use. Check out the official OpenAI website for pricing.
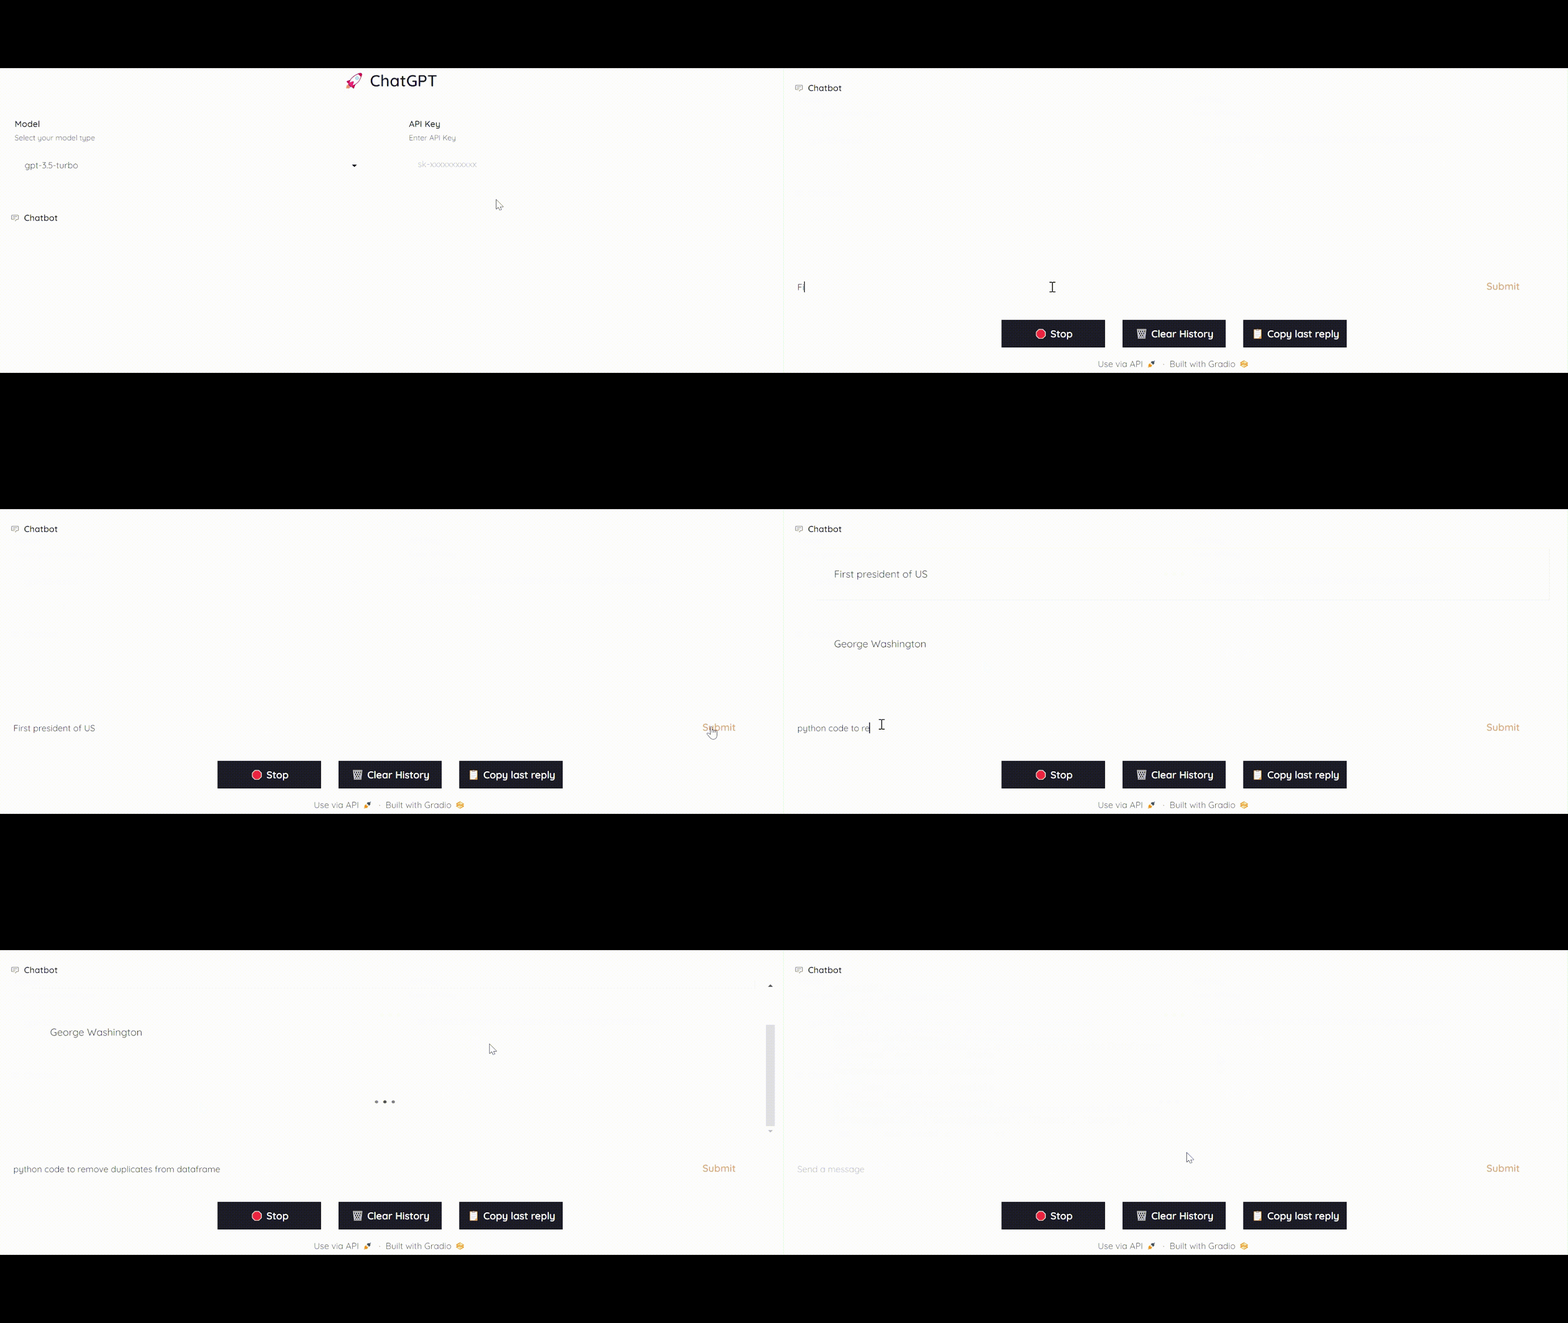
Please see the GIF image below, which shows how ChatGPT looks and works.
Features of ChatGPT Clone
The key features of ChatGPT Clone are as follows-
- Copy last reply: Users can easily copy the previous response generated by ChatGPT, making it convenient for referencing or sharing.
- Clear History: It offers the option to clear the conversation history, enabling users to start fresh.
- Ability to stop processing of running code: In case of executing code within the chat, ChatGPT Clone allows users to halt the processing if needed. It is useful to stop processing when it is running for long and not returning anything.
- Easy switching between model types: ChatGPT Clone allows you to switch between GPT-3.5 and GPT-4.
Make sure to install these 3 python packages gradio openai kivy. The package kivy will help you to copy ChatGPT output to clipboard on the click of a button.
pip install gradio openai kivy
Python code : ChatGPT Clone
import gradio as gr
import openai
from kivy.core.clipboard import Clipboard

prompt = "Send a message"

def chat(prompt, apiKey, model):
    error_message = ""
    try:
        response = openai.ChatCompletion.create(
          model = model,
          api_key = apiKey,
          messages = [{'role': 'user', 'content': prompt}],
          temperature = 0.7
        )

    except Exception as e:
        error_message = str(e)

    if error_message:
        return "An error occurred: {}".format(error_message)
    else:
        return response['choices'][0]['message']['content']


def chatGPT(userMsg, history, modelType, apiKey):
    history = history or []
    comb = list(sum(history, ()))
    comb.append(userMsg)
    prompt = ' '.join(comb)
    output = chat(prompt, apiKey, modelType)
    history.append((userMsg, output))
    return history, history

def lastReply(history):
    if history is None:
        result = ""
    else:
        result = history[-1][1]
        Clipboard.copy(result)
    return result

with gr.Blocks(theme=gr.themes.Monochrome(), css="pre {background: #f6f6f6} #submit {background-color: #fcf5ef; color: #c88f58;} #stop, #clear, #copy {max-width: 165px;} #myrow {justify-content: center;}") as demo:
    gr.Markdown("""<center><h1>🚀 ChatGPT</h1></center>""")
    with gr.Row():
        with gr.Column(scale=0.5):
            modelType = gr.Dropdown(choices=["gpt-3.5-turbo", "gpt-4"], value="gpt-3.5-turbo", label="Model", info="Select your model type" )
        with gr.Column(scale=0.5, min_width=0):
            apiKey = gr.Textbox(label="API Key", info="Enter API Key", lines=1, placeholder="sk-xxxxxxxxxxx")
    chatbot = gr.Chatbot().style(height=250)
    state = gr.State()
    with gr.Row():
        with gr.Column(scale=0.85):
            msg = gr.Textbox(show_label=False, placeholder=prompt).style(container=False)
        with gr.Column(scale=0.15, min_width=0):
            submit = gr.Button("Submit", elem_id="submit")
    with gr.Row(elem_id="myrow"):
        stop = gr.Button("🛑 Stop", elem_id="stop")
        clear = gr.Button("🗑️ Clear History", elem_id="clear")
        copy = gr.Button("📋 Copy last reply", elem_id="copy")
    clear.click(lambda: (None, None, None), None, outputs=[chatbot, state, msg], queue=False)
    submit_event = submit.click(chatGPT, inputs=[msg, state, modelType, apiKey], outputs=[chatbot, state])
    submit2_event = msg.submit(chatGPT, inputs=[msg, state, modelType, apiKey], outputs=[chatbot, state])
    stop.click(None, None, None, cancels=[submit_event, submit2_event])
    copy.click(lastReply, inputs=[state], outputs=None)

demo.queue().launch(inbrowser=True, debug=True)
How to Enable Conversation in ChatGPT API
By default, ChatGPT API does not retain the memory of previous conversations. Each API request is treated as a separate chat session, so when ChatGPT responds to your current query, it does not recall any information from your previous questions.
To make ChatGPT remember prior conversations, you need to provide the context every time you interact with it. Refer the python code below to see how it works.
import openai
import os
os.environ['OPENAI_API_KEY'] = "sk-xxxxxxxxxxxxxxxxxxxxxxx"
openai.api_key = os.getenv("OPENAI_API_KEY")


chatHistory = []
def chat(prompt, modelName="gpt-3.5-turbo", temperature=0.7, top_p=1):
    params = {
        "model": modelName,
        "temperature": temperature,
        "top_p": top_p
    }

    chatHistory.append({"role": "user", "content": prompt})

    response = openai.ChatCompletion.create(
        **params,
        messages=chatHistory
    )

    answer = response["choices"][0]["message"]["content"].strip()
    chatHistory.append({"role": "assistant", "content": answer})

    return answer
chat("2+2")
4

chat("square of it")
16

chat("add 3 to it")
19


Share Share Tweet