This tutorial explains the steps to install PyTorch on Windows.
PyTorch is a free and open source machine learning library developed by Facebook's AI Research lab. It is built on the Torch library and is mainly used for tasks like computer vision and natural language processing (NLP).
Prerequisites
Make sure your computer satisfies the following requirements before installing PyTorch
- Windows 10 or higher (recommended)
- Python 3.8 or higher
- CUDA for GPU support (optional)
The first step is to check that your Python version is Python 3.8 or higher. To do this, open the command prompt using the Windows key + R shortcut, type "cmd" and then enter the following command.
python --version
Multiple Ways to Install PyTorch on Windows
You have the option to install PyTorch using either pip or conda. conda is used if you want to install PyTorch with Anaconda.
pip
Step 1 : It is important to check if pip is already installed. Enter the following command in the command prompt to check it.
pip --version
If you can see the pip version after entering the above command, it means pip is already installed on your computer.
Step 2 : Install PyTorch
Please use one of the commands below based on your system configuration to get the PyTorch installed.
If you don't have an NVIDIA GPU supported on your system, you can use the following code to run PyTorch on CPU.
pip3 install torch torchvision torchaudio
If you have an NVIDIA GPU and want to run PyTorch on GPU, you can make use of CUDA which is a parallel computing platform and programming model developed by NVIDIA for general computing on GPUs.
For CUDA 11.8 version, make sure you have Nvidia Driver version 452.39 or higher.
pip3 install torch torchvision torchaudio --index-url https://download.pytorch.org/whl/cu118
For CUDA 12.1 version, make sure you have Nvidia Driver version 527.41 or higher.
pip3 install torch torchvision torchaudio --index-url https://download.pytorch.org/whl/cu121
Step 3 : Verify Installation
To confirm if PyTorch is installed, run the command below.
pip3 show torch
conda
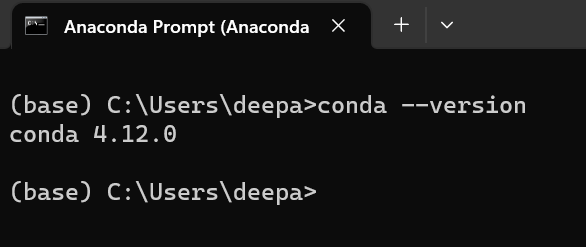
Step 1 : Check if conda is already installed by entering the following command in the Anaconda Prompt.
Open Anaconda Prompt by clicking on Start > Anaconda3 > Anaconda Prompt
conda --version
The above code returns the conda version if it is already installed on your system.
Step 2 : Install PyTorch
First open Anaconda Prompt in Administrator mode. Please use one of the commands below based on your system configuration to get the PyTorch installed.
If you don't have an NVIDIA GPU supported on your system, you can use the following code to run PyTorch on CPU.
conda install pytorch torchvision torchaudio cpuonly -c pytorch
If you have an NVIDIA GPU and want to run PyTorch on GPU, you can make use of CUDA which is a parallel computing platform and programming model developed by NVIDIA for general computing on GPUs.
For CUDA 11.8 version, make sure you have Nvidia Driver version 452.39 or higher.
conda install pytorch torchvision torchaudio pytorch-cuda=11.8 -c pytorch -c nvidia
For CUDA 12.1 version, make sure you have Nvidia Driver version 527.41 or higher.
conda install pytorch torchvision torchaudio pytorch-cuda=12.1 -c pytorch -c nvidia
Step 3 : Verify Installation
To confirm if PyTorch is installed, run the command below in the Anaconda Prompt.
conda list -f pytorch


Share Share Tweet