In this tutorial, we will explain how to use ChatGPT API in Python, along with examples.
Please follow the steps below to access the ChatGPT API.
- Visit the OpenAI Platform and sign up using your Google, Microsoft or Apple account.
- After creating your account, the next step is to generate a secret API key to access the API. The API key looks like this -
sk-xxxxxxxxxxxxxxxxxxxx - If your phone number has not been associated with any other OpenAI account previously, you may get free credits to test the API. Otherwise you have to add atleast 5 dollars into your account and charges will be based on the usage and the type of model you use. Check out the pricing details in the OpenAI website.
- Now you can call the API using the code below.
Step 1 : To install the OpenAI Python library, run this command : pip install openai
Step 2 : Enter your API key in os.environ["OPENAI_API_KEY"] = and input the question you would like to ask in the prompt argument in the code below.
import os
import openai

# Set API Key
os.environ["OPENAI_API_KEY"] = "sk-xxxxxxxxxxxxxxxxxxxxxx"
openai.api_key = os.getenv("OPENAI_API_KEY")

def chatGPT(prompt,
            model="gpt-5.4",
            temperature = 0.7,
            top_p=1):
    error_message = ""
    try:
        response = openai.ChatCompletion.create(
          model = model,
          messages = [{'role': 'user', 'content': prompt}],
          temperature = temperature,
          top_p = top_p
        )

    except Exception as e:
        error_message = str(e)

    if error_message:
        return "An error occurred: {}".format(error_message)
    else:
        return response['choices'][0]['message']['content']

# Run Function
print(chatGPT("efficient way to remove duplicates in python. Less verbose response."))

In the model argument, you can enter any of the following model. All of them points to their respective latest model version.
To read the difference between these models, you can refer to this documentation.
Sometimes you want ChatGPT to consider some high-level instructions while providing responses. In simple words, what do you want ChatGPT to know about you to provide responses. For example, you want the model to "act like a linguistic expert and provide responses in layman's terms". You can input instructions in the system_instruction argument in the code below.
# System Message
def chatGPT(prompt,
system_instruction=None,
model="gpt-5.4",
temperature = 0.7,
top_p=1):
error_message = ""
try:
messages = [{'role': 'user', 'content': prompt}]
if system_instruction:
messages.insert(0, {'role': 'system', 'content': system_instruction})
response = openai.ChatCompletion.create(
model = model,
messages = messages,
temperature = temperature,
top_p = top_p
)
except Exception as e:
error_message = str(e)
if error_message:
return "An error occurred: {}".format(error_message)
else:
return response['choices'][0]['message']['content']
# Run Function
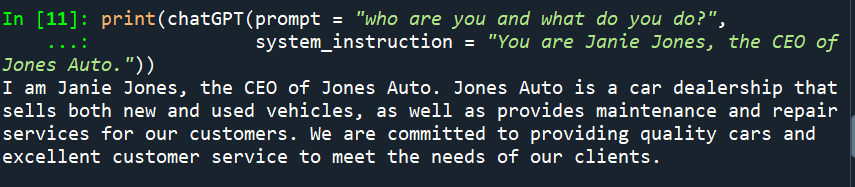
print(chatGPT(prompt = "who are you and what do you do?",
system_instruction = "You are Janie Jones, the CEO of Jones Auto."))
The ChatGPT website remembers prior conversations while providing responses of the current question. For example : You ask '2+2', it answers '4'. Then you ask follow-up questions like "square of it", it returns '16'. So it remembers the prior response of '2+2'.
By default, the ChatGPT API does not remember prior conversations. However, we can make the ChatGPT API remember prior conversations by feeding it the previous questions and responses in each API request.
# ChatGPT Chat
import os
import openai
os.environ['OPENAI_API_KEY'] = "sk-xxxxxxxxxxxxxxxxxxxxxxx"
openai.api_key = os.getenv("OPENAI_API_KEY")


chatHistory = []
def chatGPT_chat(prompt, modelName="gpt-5.4", temperature=0.7, top_p=1):
    params = {
        "model": modelName,
        "temperature": temperature,
        "top_p": top_p
    }

    chatHistory.append({"role": "user", "content": prompt})

    response = openai.ChatCompletion.create(
        **params,
        messages=chatHistory
    )

    answer = response["choices"][0]["message"]["content"].strip()
    chatHistory.append({"role": "assistant", "content": answer})

    return answer

chatGPT_chat("2*3")
# 6

chatGPT_chat("square of it")
# The square of 6 is 36.

chatGPT_chat("add 3 to it")
# Adding 3 to 36, we get 39.
You can use the latest ChatGPT-5 model called gpt-5.4 that accepts image inputs and returns output in the form of text.
import openai
def chatGPT_image(prompt,
            image_url,
            model="gpt-5.4",
            detail = "low",
            max_tokens=300):
    error_message = ""
    try:
        messages = [{
            'role': 'user', 'content': [
            {"type": "text", "text": prompt},
            {"type": "image_url",
             "image_url": {"url" : image_url, "detail" : detail},
             },
            ],
            }]

        response = openai.ChatCompletion.create(
          model = model,
          messages = messages,
          max_tokens=max_tokens
        )

    except Exception as e:
        error_message = str(e)

    if error_message:
        return "An error occurred: {}".format(error_message)
    else:
        return response['choices'][0]['message']['content']

# Run Function
response = chatGPT_image(prompt = "What's in the image?",
              image_url = "https://blogger.googleusercontent.com/img/b/R29vZ2xl/AVvXsEgCGchJj9jVRP0jMND1a6tJXj7RcYWtnCO4J6YcbPTXrNxiCvs_3NSk7h2gB0h2sc_6bTvwPrBeBHwUA45AXAhaw1uuINuPDcHCbARxpgJIXM5Spi_0P45aR6tqZ_yof-YlNn41LhzHjfW-wsV3mhxBug4To8xtgyMzsHLbm3XoaHZmYUdNY1YWJA5rh6cB/s1600/Soccer-1490541_960_720.jpg")

print(response)
The image depicts an intense soccer match between two players who are actively contesting for possession of the ball. The player on the left is wearing a dark green and white uniform with the number 16 on his jersey, while the player on the right is wearing a white uniform with the number 2 on his jersey. There is another player in the background, partly visible, also wearing a dark green and white uniform. The match appears to be happening at night or in low-light conditions, as the background is dark. Both players seem to be very focused on the ball.
Let's say you have an image on your local device instead of stored on cloud. You need to convert it to base64 image format. Please make sure to install base64 library before running the code below.
import base64
import os
import openai

# Set API Key
os.environ["OPENAI_API_KEY"] = "sk-xxxxxxxxxxxxxxxxxxx"
openai.api_key = os.getenv("OPENAI_API_KEY")

def base64_image(image_path):
  with open(image_path, "rb") as image_file:
    return base64.b64encode(image_file.read()).decode('utf-8')


def chatGPT_image(prompt,
            image_path,
            model="gpt-5.4",
            detail = "low",
            max_tokens=300):
    error_message = ""

    base64_img = base64_image(image_path)

    try:
        messages = [{
            'role': 'user', 'content': [
            {"type": "text", "text": prompt},
            {"type": "image_url",
             "image_url": {"url" : f"data:image/jpeg;base64,{base64_img}",
                           "detail" : detail},
             },
            ],
            }]

        response = openai.ChatCompletion.create(
          model = model,
          messages = messages,
          max_tokens=max_tokens
        )

    except Exception as e:
        error_message = str(e)

    if error_message:
        return "An error occurred: {}".format(error_message)
    else:
        return response['choices'][0]['message']['content']

# Run Function
response = chatGPT_image(prompt = "What's in the image?",
              image_path = "C:\\Users\\deepa\\Downloads\\Soccer-1490541_960_720.jpg")

print(response)
In the following code, we are building an application using tkinter python library that creates a graphical user interface (GUI). It includes several widgets such as text boxes, buttons, dropdowns etc.
To install the tkinter library, run this command : pip install tkinter.
import os
import openai
import tkinter as tk

# Set API Key
os.environ["OPENAI_API_KEY"] = "sk-xxxxxxxxxxxxxxxxxxxxxx"
openai.api_key = os.getenv("OPENAI_API_KEY")

def chatGPT(prompt,
            model="gpt-5.4",
            temperature = 0.7,
            top_p=1):
    error_message = ""
    try:
        response = openai.ChatCompletion.create(
          model = model,
          messages = [{'role': 'user', 'content': prompt}],
          temperature = temperature,
          top_p = top_p
        )

    except Exception as e:
        error_message = str(e)

    if error_message:
        return "An error occurred: {}".format(error_message)
    else:
        return response['choices'][0]['message']['content']

# tikinter GUI Application
def chatgpt_output():
    input_text = input_field.get()
    model_name = dropdown_var.get()
    response = chatGPT(input_text, model_name)
    output_field.config(state='normal')
    output_field.delete(1.0, tk.END)
    output_field.insert(tk.END, response)
    output_field.config(state='disabled')

# Define the function to get the selected option
def on_select(value):
    print("Selected model:", value)

# Create the main window
root = tk.Tk()
root.title("ChatGPT")
root.geometry("600x700")

options = ["gpt-5.4", "gpt-4", "gpt-4-turbo"]

# Create a label
label = tk.Label(root, text="Select Model:", font=("Arial", 12, "italic"))
label.pack()

# Create dropdown menu
dropdown_var = tk.StringVar(root)
dropdown_var.set(options[0])
dropdown_font = ('Arial', 12)
dropdown = tk.OptionMenu(root, dropdown_var, *options, command=on_select)
dropdown.config(font=dropdown_font)
dropdown.pack()

# Create a label for the input field
input_label = tk.Label(root, text="Enter Your Prompt:", font=("Arial", 14, "italic"))
input_label.pack(pady=5)

# Create input field
input_field = tk.Entry(root, font=("Arial", 14), width=50, bd=2, relief="groove", justify="left")
input_field.pack(pady=5, ipady=15)

# Create submit button
submit_button = tk.Button(root, text="Submit", font=("Arial", 14), command=chatgpt_output)
submit_button.pack(pady=10)

# Create output box
output_field = tk.Text(root, font=("Arial", 14), state='disabled')
output_field.pack(pady=10)

# Start
root.mainloop()
The GUI developed using the tkinter library lacks fancy visuals. To build a more modern and stylish interface, use the Gradio package and refer to this article for the same - Building ChatGPT Clone in Python Using Gradio

Deepanshu founded ListenData with a simple objective - Make analytics easy to understand and follow. He has over 10 years of experience in data science. During his tenure, he worked with global clients in various domains like Banking, Insurance, Private Equity, Telecom and HR.
Share Share Tweet